 |
|
|
|
|
|
|
|
|
|
|
|
|
|
|
|
|
|
|
|
|
|
|
|
|
|
|
|
|
|
|
 |
|
 |
|
 |
|

|
|
|
|
|
|
|
|
Mission 2: Dark Secret Part 2: Catacombs
Objectives:
1) Locate Professor Zemphs's Journal.
2) Pursue SS Paranormal personnel through the catacombs.
|
|
|
|
|
|
|
|
|
|
|
|
 |
|
|
|
|
|
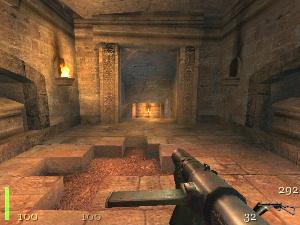
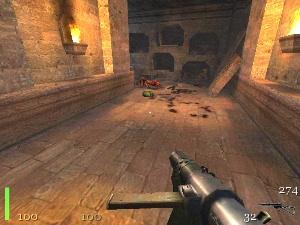
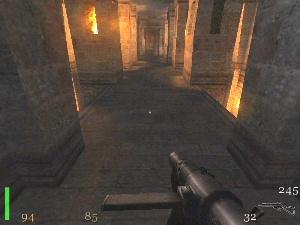
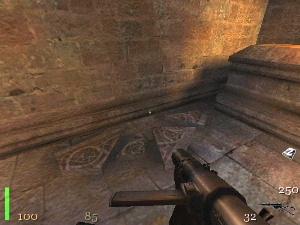
This level gives me the creeps ! You start here. Go down the stairs ahead, turn right and enter a room with a gaping hole in the floor.
|
|
|
|
|
|
|
|
|
|
|
|
|
 |
|
|
|
|
|
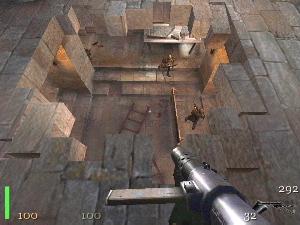
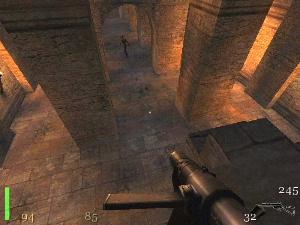
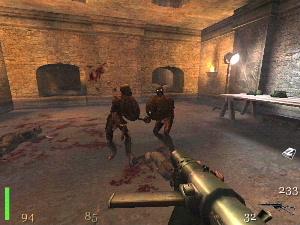
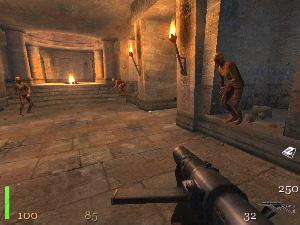
Stay up top and watch some zombies battle it out with a few soldiers. As the battle progresses you can shoot one or two of whoever seems to be getting on top as it will make your life easier when you do drop down. Any survivors down here tend to hide behind the pillars in the corners so a couple of well lobbed grenades will sort out any nasty surprises.
|
|
|
|
|
|
|
|
|
|
|
|
|
 |
|
|
|
|
|
Once on the floor take note of the ammo and supplies down here, including more grenades. Even if you don't need them now remember where this room is. You can come back to it later. Leave via the only exit and follow the corridor around to the right. You will encounter a few zombie knights. As always, I use the Sten against the undead.
|
|
|
|
|
|
|
|
|
|
|
|
|
 |
|
|
|
|
|
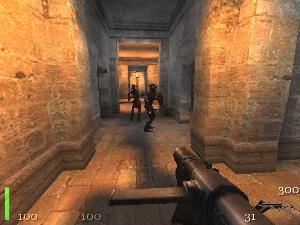
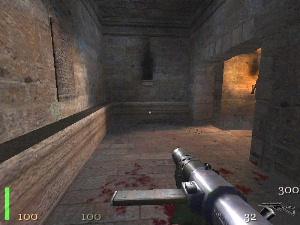
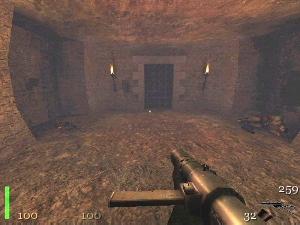
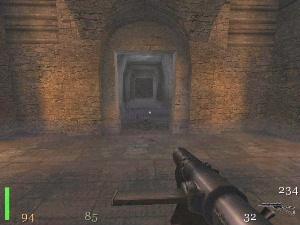
The very next room you reach is this one. At the moment your only way out is ahead, but note two other potential exits for the time being. To the left is a gated pathway, locked for the time being. To the right is a carved panel that you will emerge from later on.
|
|
|
|
|
|
|
|
|
|
|
|
|
 |
|
|
|
|
|
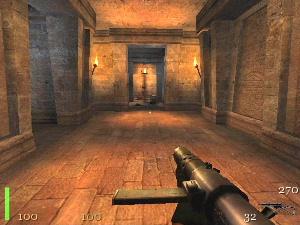
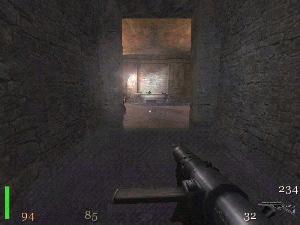
Proceed ahead now and drop down the steps and turn left. You are greeted with a zombie or two eating a Big Mac Meal German style. Feed them lead and carry on around that corner.
|
|
|
|
|
|
|
|
|
|
|
|
|
 |
|
|
|
|
|
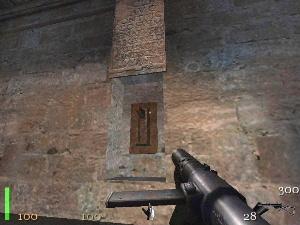
As you approach that opening note the panel on the wall on the left. It can't be opened yet but it soon will be.
|
|
|
|
|
|
|
|
|
|
|
|
|
 |
|
|
|
|
|
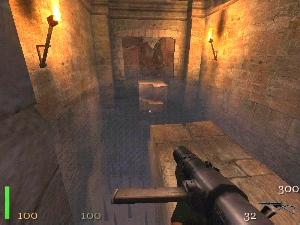
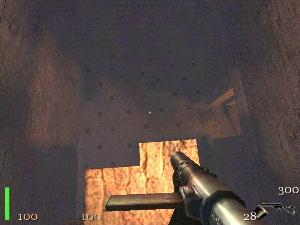
Here is a collapsed pathway above a pit of spikes. If you fell down now it's game over. From here shoot out the crumbling wall on the other side. Sprint / run and jump across.
|
|
|
|
|
|
|
|
|
|
|
|
|
 |
|
|
|
|
|
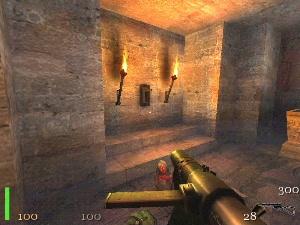
In the room across the gap is this switch. Pulling it does two things: 1) It uncovers that panel back over the other side, and 2) Releases more of the undead. Quickly exit and jump back over to the other side. Don't drop down as the spikes are still up. From here you can safely kill the newly arrived zombs.
|
|
|
|
|
|
|
|
|
|
|
|
|
 |
|
|
|
|
|
Here is the uncovered panel. This switch will lower those spikes so that you can continue.
|
|
|
|
|
|
|
|
|
|
|
|
|
 |
|
|
|
|
|
Before dropping down move up to the path edge like this. After dropping down here the only way out is through that doorway to the right. Beyond that door is a zombie Knight. Also, two more living dead burst out of the walls down here so be ready.
|
|
|
|
|
|
|
|
|
|
|
|
|
 |
|
|
|
|
|
You will come to this door with it's switch on the left. As you enter more undead will come out of the walls. In here you can collect ammo before going through. On the other side is a staircase that takes you up to a previous part.
|
|
|
|
|
|
|
|
|
|
|
|
|
 |
|
|
|
|
|
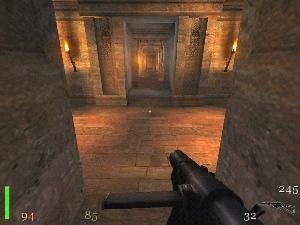
You are now back at an earlier part of this level, this time you are emerging from the carved panel and the previously gated and locked passage is now open. That's it ahead of you.
|
|
|
|
|
|
|
|
|
|
|
|
|
 |
|
|
|
|
|
As you pass the gate you see what looks like a safe pathway. If you moved forward quickly the floor will give way dumping you down a level amongst more zombies.
|
|
|
|
|
|
|
|
|
|
|
|
|
 |
|
|
|
|
|
A tactic of mine is to crouch and edge forward, and to one side. As you round a corner, hugging the wall all the time the floor will drop but you will stay up. This gives you the opportunity to kill from safety. By manoeuvring to both sides and using the lean key, you can lob a couple of grenades to dispose of enemies that you otherwise couldn't see.
|
|
|
|
|
|
|
|
|
|
|
|
|
 |
|
|
|
|
|
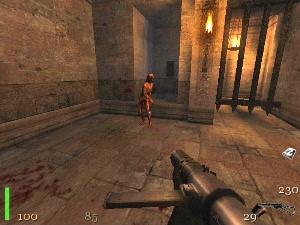
Either way, another knight will break down this door at the other end of the room. It's your way out. As you proceed down here crumbling masonry alerts some Germans around a corner.
|
|
|
|
|
|
|
|
|
|
|
|
|
 |
|
|
|
|
|
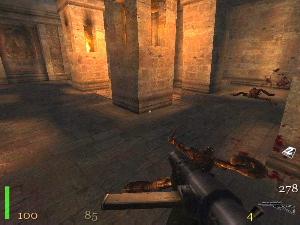
They are in here, along with Zemph's Book. You will have to kill them to move on.
|
|
|
|
|
|
|
|
|
|
|
|
|
 |
|
|
|
|
|
Zemph's Book is on that table there. Picking it up and moving around will make more zombies drop in, literally. Additionally, there are four exits from this room. One or two may already be broken open. The ones to the right of the table will yield more supplies, the ones to left lead to the next part and these two additional knights.
|
|
|
|
|
|
|
|
|
|
|
|
|
|
|
|
|
|
|
|
|
 |
|
|
|
|
|
Beyond the room climb up this rubble strewn slope and turn about.
|
|
|
|
|
|
|
|
|
|
|
|
|
 |
|
|
|
|
|
Moving around the corner will lead to this rotten guy. Drop him quick and note for the moment that he came from another room. Don't go in there yet, turn left first.
|
|
|
|
|
|
|
|
|
|
|
|
|
 |
|
|
|
|
|
Ahead of you is this section. As you move forward you will have to battle some more. When finished note this fork. That path to the left may seem like a dead end, but that decorated panel hides a secret. You can't open it from here, you need to go back to that room where that previous zombie came from.
|
|
|
|
|
|
|
|
|
|
|
|
|
 |
|
|
|
|
|
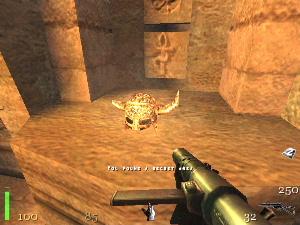
In here against the far wall are these broken shards on the floor. On the wall above these pieces is a stone to activate. A little searching will locate it. This opens that decorated panel but only for a short time. So, run back out to it and jump through.
|
|
|
|
|
|
|
|
|
|
|
|
|
 |
|
|
|
|
|
Here you. A nice shiny helmet, oo-er. Although you have this treasure, before leaving, note these symbols on the wall behind the loot.
|
|
|
|
|
|
|
|
|
|
|
|
|
|
|
|
|
|
|
|
|
 |
|
|
|
|
|
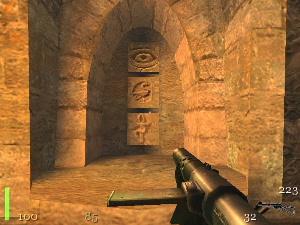
Try to remember what they are and their order. An eye, a bird and the Ankh symbol. You will need to remember this for later. To leave this room you will need to activate a lever in here.
|
|
|
|
|
|
|
|
|
|
|
|
|
 |
|
|
|
|
|
Go out, turn left, and pick either of these two stair ways. They both lead to your next appointment with fear.
|
|
|
|
|
|
|
|
|
|
|
|
|
 |
|
|
|
|
|
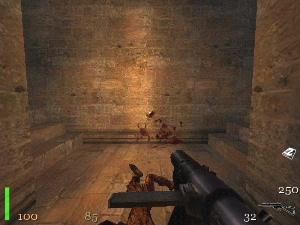
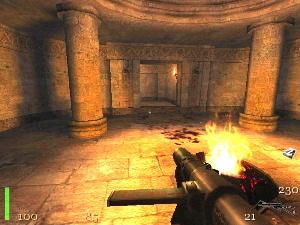
At the top of the stairs you enter this room where gates drop down and trap you in here. Three more undead beak out on you. When the last one is killed I switch to the Dynamite immediately. Set it to 5 seconds, the minimum, and dump it next to the fire.
|
|
|
|
|
|
|
|
|
|
|
|
|
 |
|
|
|
|
|
Out of the flames this fire breathing guy will start to arise. He can be brought down with gunfire, but beware as he can spit his flames a fair distance. Timed right, the Dynamite will shatter him before he can close on you.
|
|
|
|
|
|
|
|
|
|
|
|
|
 |
|
|
|
|
|
His demise releases another wall dweller. The chamber he emerges from holds a switch that opens the exit to this level.
|
|
|
|
|
|
|
|
|
|
|
|
|
 |
|
|
|
|
|
|
|
|
|
|
|
|
|
|
|
|
|
|
|
|
|
|